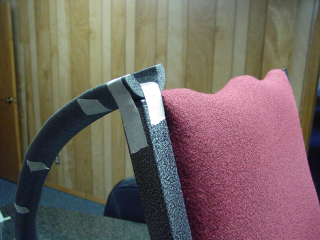
Tape the top of the half-pipe to the chair prop. It is easier
to get a good track curve if the track starts horizontal. Note that chair is
set up on top of table, this provides a better and less error-sensitive
trajectory for catching the marble later.
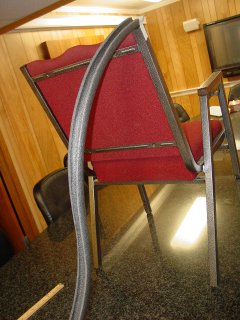
Extend cup 'base' away from table prop, far enough so that no
part of the track is vertical, but close enough that the track touches the
ground before rising up to the level of the cup. The nadir of the marble's run should barely touch
the ground, to give the maximum launch distance after it departs the ramp.
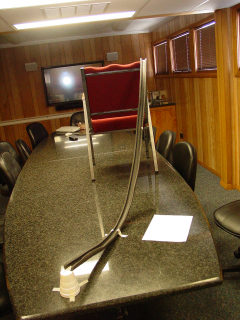
Here's an example of a ramp that is far too steep. You can
see in the picture that the ramp is actually more than vertical! It
extends backwards for a brief stretch. Make sure your ramp doesn't do this, as
the marble will skitter on its way down, making the calibration very difficult.
 The Shodor Education Foundation, Inc.